
Set Up a WireGuard VPN with wg-easy in Five Minutes and Reach Your Home LAN from Anywhere
Want to reach your home NAS, printer, or router from anywhere? WireGuard is the most popular VPN protocol today, and wg-easy makes deployment easier than ever. This article walks you through setting up a WireGuard VPN with Docker so you can securely reach your home LAN over the public internet.
Introduction
As a Homelab enthusiast, I run all kinds of services at home: a NAS holding files, a printer sharing documents, a router admin panel, an OpenClaw AI assistant… These services are only exposed on the LAN, which is perfectly comfortable while you are at home, but the moment you step out and need a file, all you can do is stare longingly at the network.
Traditional tunneling solutions are either unstable, expensive, or complicated to configure. Today I want to recommend a ready-to-use option: wg-easy + WireGuard. Deploy it with a single Docker command and in five minutes you have your own secure VPN to connect back to your home LAN anytime, anywhere.
Reference video: (to be published)
Project URL: https://github.com/wg-easy/wg-easy
Why WireGuard + wg-easy
WireGuard is the hottest modern VPN protocol right now. Compared with OpenVPN it is:
- ✅ Faster: more efficient encryption and lower latency
- ✅ Lighter: a kernel-level implementation with minimal resource usage
- ✅ More secure: a small, easy-to-audit codebase
- ✅ Easier to use: simple configuration and roaming support
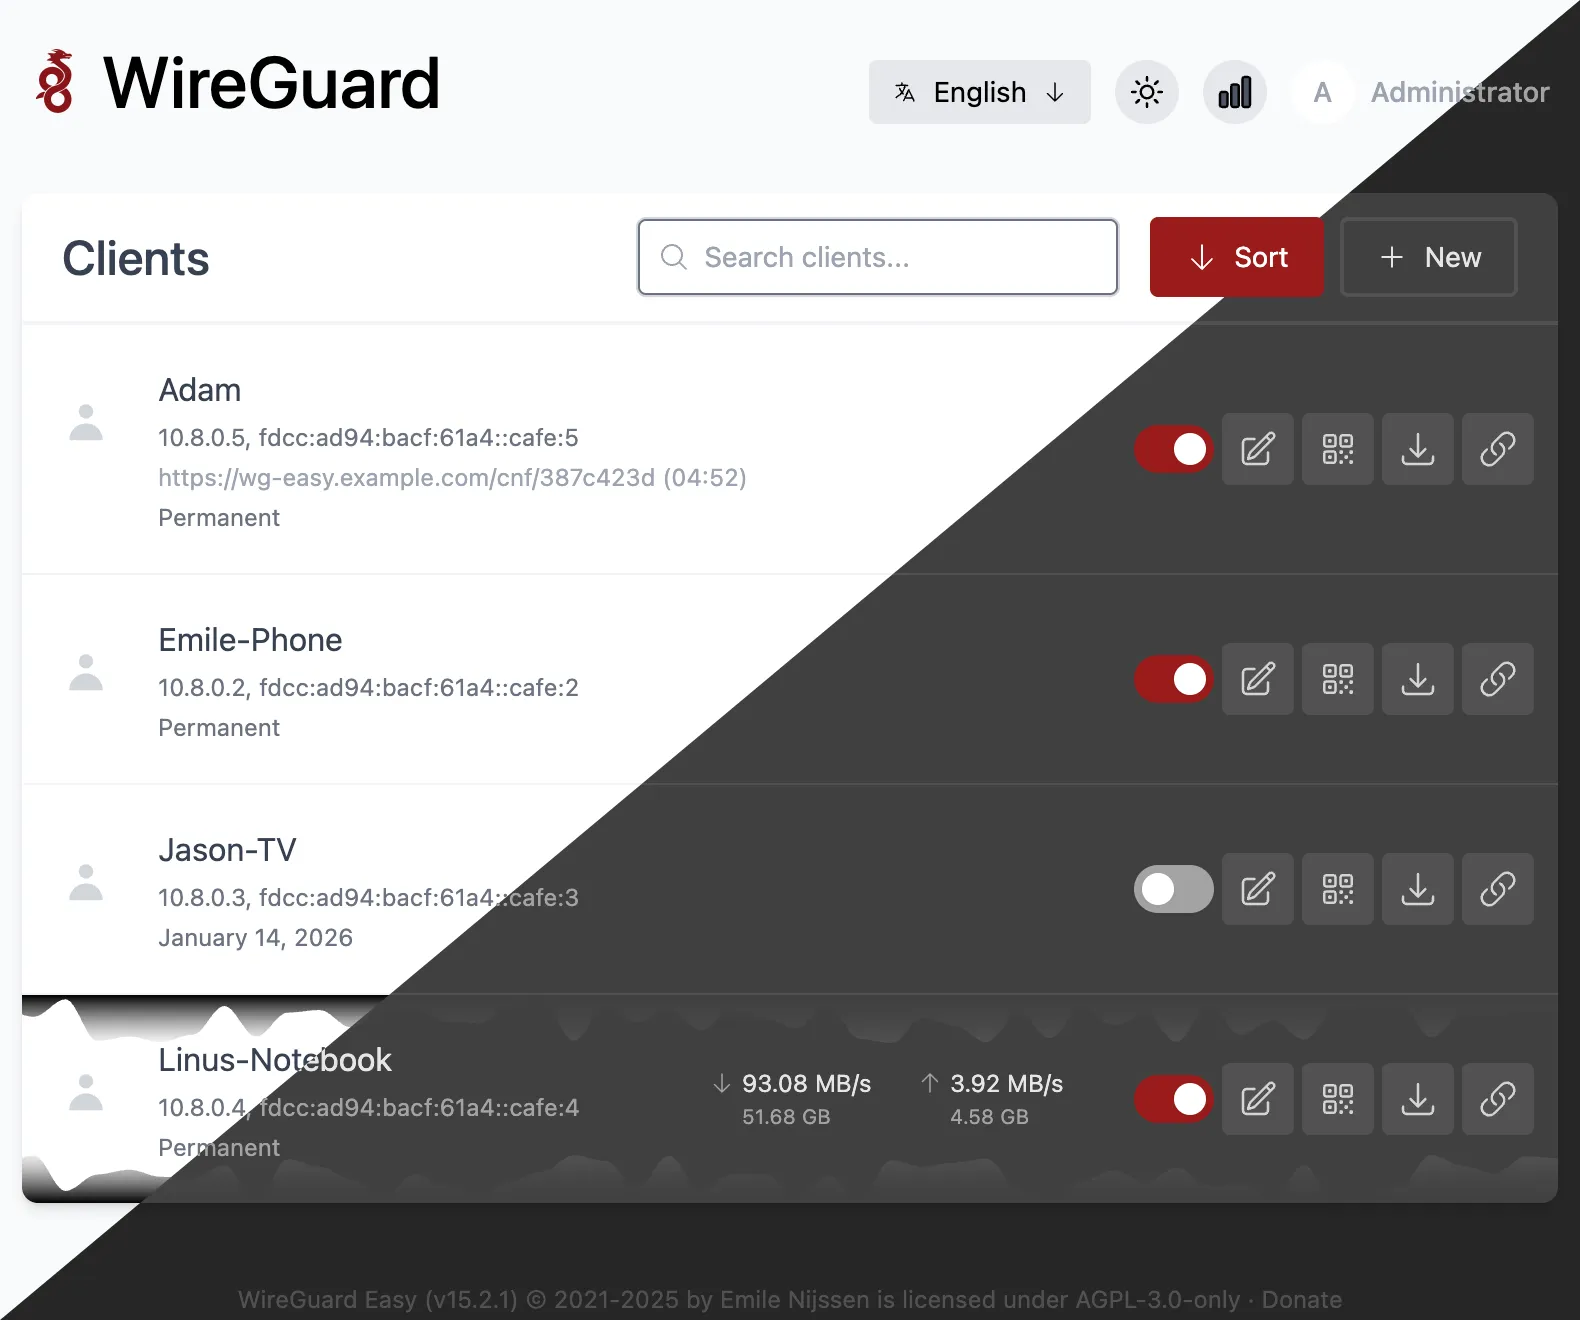
And wg-easy wraps WireGuard’s complex configuration into a friendly web UI, letting you:
- 🐳 One-command Docker deployment
- 🖥️ A visual web management interface
- 🔑 One-click client-config QR codes
- 📱 Scan with your phone and connect, no manual config editing
- 🌍 All core settings are done in the web UI, with no container restarts
💡 Version note: wg-easy reworked its configuration system after version 15 — parameters such as
WG_HOSTandPASSWORDare now set in the web UI. This article is written for the latest version.
Preparation
Before you start, you will need:
- A server reachable from the public internet (ideally deployed at home on your NAS/router if you have a public IP; a VPS works too if you don’t)
- Docker and Docker Compose already installed
- Open ports:
51820/udp(the WireGuard port) and51821/tcp(the web admin port)
Deployment Steps
1. Create the Docker Compose File
Create a directory, then add a new docker-compose.yml:
services:
  wg-easy:
    image: ghcr.io/wg-easy/wg-easy:15
    container_name: wg-easy
    restart: unless-stopped

    environment:
      #Enable this if you use an HTTPS reverse proxy
      - INSECURE=true
    volumes:
      - etc_wireguard:/etc/wireguard

    ports:
      - "51820:51820/udp"
      - "51821:51821/tcp"

    cap_add:
      - NET_ADMIN
      - SYS_MODULE

    sysctls:
      - net.ipv4.ip_forward=1
      - net.ipv4.conf.all.src_valid_mark=1
2. Start the Container
docker-compose up -dWait for the image pull to finish. Once the container is up, visit http://your-server-ip:51821 to open the admin interface. The first visit takes you through a setup wizard.
3. Finish Configuration in the Web UI
The setup wizard will ask you to configure:
- Admin username and password: set the login credentials for the web admin interface
- WireGuard port: defaults to
51820, usually no need to change - Host address: enter your server’s public IP or domain name; this address is written into the client config automatically
Confirm the settings and save.
If you want clients to route only LAN IP traffic instead of all traffic, you need to configure the allowed IPs: open the admin panel in the top right -> Network Configuration -> Allowed IPs -> enter 10.8.0.0/24 (the default subnet).
4. Add a Client
Once configuration is done, log into the web UI, click “Create Client”, enter a client name (such as “iPhone” or “MacBook Pro”), and create it.
After creation, a QR code is displayed:
- On mobile: install the WireGuard app, tap “Add Tunnel” → “Import from QR code”, and scan to import the config
- On desktop: click “Download” to get the config file and import it into the WireGuard client
Using the Clients
WireGuard clients are available on every platform:
| Platform | How to get it |
|---|---|
| iOS | Search «WireGuard» on the App Store |
| Android | Google Play, or download from GitHub |
| Windows | Official site https://www.wireguard.com/install/ |
| macOS | App Store or Homebrew |
After importing the config, tap “Connect” and all your devices join the same VPN network:
- Whatever the VPN server (your home NAS/VPS) can reach, your phone or laptop can reach too
- All clients can see each other and communicate directly over the private network
- If you deploy wg-easy at home, connecting to the VPN is the same as being on your home LAN — you can reach any internal service just as if you were home
Hands-On Experience
The biggest advantage of wg-easy is simplicity. For accessing your home LAN from outside, it is definitely the most elegant self-hosted VPN solution available right now:
- Fast startup: the container starts instantly and connections establish in just a few hundred milliseconds
- Easy management: add or remove users with a few clicks in the web UI, with every setting visible
- QR-code import: incredibly convenient on mobile, no copying and pasting configs
- Stable operation: more stable after the rewrite, running long-term without issues
FAQ
Q: The connection succeeds, but I can’t reach the home LAN?
A: Make sure wg-easy is deployed on a gateway/server inside your home network that can already reach the LAN. Once IP forwarding is configured in WireGuard, clients will be able to reach it naturally.
Q: Is sharing a config via QR code safe?
A: The QR code contains that client’s individual key, so just use it yourself. As long as you don’t leak the QR code, you’re fine. Each client has its own key and can be revoked and deleted from the web UI at any time.
Q: Can multiple devices connect at the same time?
A: Absolutely. One client config per device, no interference between them, and it’s all clear at a glance in the web UI.
Q: Do I need to reconfigure when upgrading from v14 to v15?
A: Yes. v15 reworked the config storage format, so it’s best to back up and redeploy.
Conclusion
If you need to reach your home LAN from outside and don’t want to use a third-party tunneling service, wg-easy + WireGuard is definitely one of the best options available right now:
- 👍 Simple deployment: one Docker command to start, all configuration in the web UI
- 👍 Easy management: adding and removing users is fully visual
- 👍 Excellent performance: WireGuard is itself a kernel-level implementation, so it’s fast with low latency
- 👍 Completely free: an open-source project with no usage limits and no user limits
Set one up now and you’ll be able to access your home files anytime, even on the go!
Comments