
How to Get Free v2ray Nodes
Using the FOFA cyberspace mapping engine together with Excel batch processing to quickly generate and filter hundreds or thousands of usable nodes.
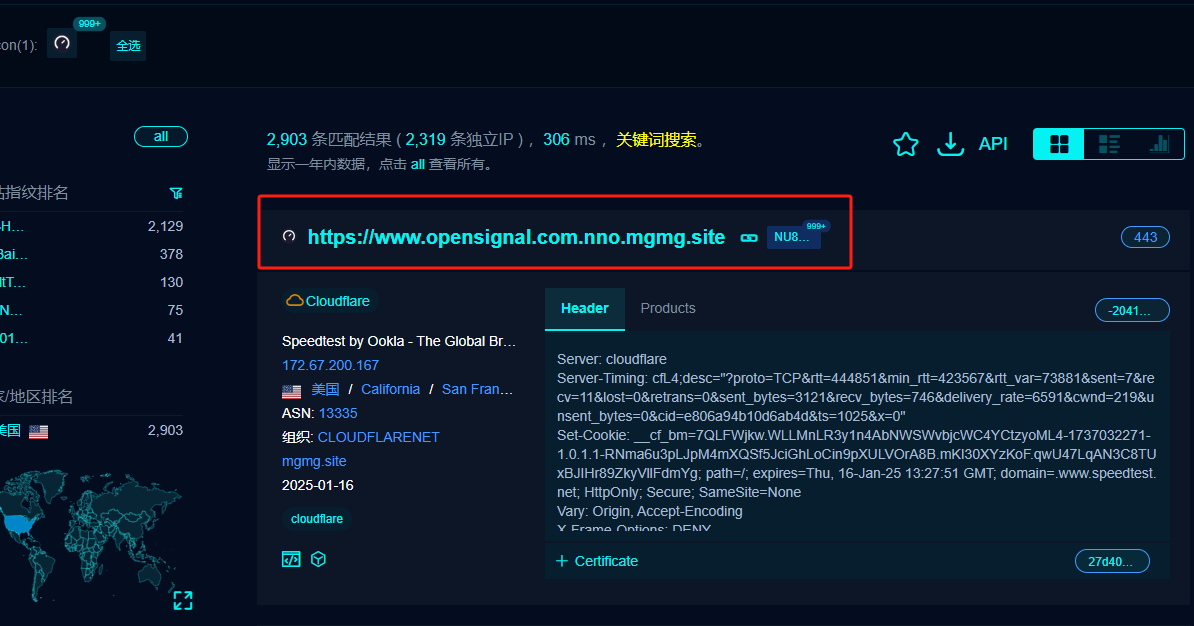
Today I’ll share a “hardcore” method: using the FOFA cyberspace mapping engine together with Excel batch processing to quickly generate and filter usable nodes.
🛠️ Tools You’ll Need
- A FOFA account (a regular registered user is fine, with some free export quota)
- Excel or WPS Spreadsheets
- v2rayN (or another client that supports batch import and speed testing)
📝 Step-by-Step Guide
Step 1: Search for Target Resources with FOFA
First, we use FOFA’s powerful search engine to find Cloudflare nodes that match the signature.
-
Open your browser and go straight to this search link:
Click here to view the FOFA search results
If you want to type the syntax manually, the query is:
icon_hash="-1354027319" && asn="13335" && port="443"How it works:asn="13335": lock onto Cloudflare’s ASN.port="443": filter targets with the HTTPS port open.icon_hash: filter by a specific favicon fingerprint (here it usually points to a particular panel or Worker deployment signature).
Step 2: Export the Data to Excel
- On the right side of the search results page, find the “Download” icon (usually a downward arrow).
- Click download and FOFA will prompt you to export the data. After logging in, ordinary users usually have some free credits or quota, so just confirm.
- Once the download finishes, you’ll get a spreadsheet file in
.xlsor.csvformat.
Step 3: Clean the Data and Generate Formulas in Excel (the key step)
This step turns the messy search results into Trojan links that v2rayN can recognize.
-
Extract the domains: Open the downloaded spreadsheet and find the Host column (the one containing the domains).
-
Clean the data: Copy the Host column into a new blank column (say column A).
- Note: You must remove the
https://prefix from the cells and keep only the bare domain (for example, turnhttps://www.speedtest.netintowww.speedtest.net). You can use Excel’s “Find and Replace” feature to removehttps://in bulk.
- Note: You must remove the
-
Build the link formula: In the first cell of column B (or another blank column), enter the following formula:
⚠️ Note: In the formula,
A1is the cell where you store the bare domain; adjust it to match your actual layout.=CONCAT("trojan://bpb-trojan@",A1,":443?security=tls&sni=",A1,"&alpn=h3&fp=randomized&allowlnsecure=1&type=ws&host=",A1,"&path=%2Ftr%3Fed%3D2560#BPB") -
Generate in bulk: Select the cell containing the formula and double-click the fill handle in the bottom-right corner (or drag it down); Excel will automatically generate the corresponding Trojan link for every domain in the list. Example output:
trojan://bpb-trojan@www.speedtest.net:443?security=tls&sni=www.speedtest.net&alpn=h3&fp=randomized&allowlnsecure=1&type=ws&host=www.speedtest.net&path=%2Ftr%3Fed%3D2560#BPB
Step 4: Import into v2rayN
- Copy the links: In Excel, select all the Trojan links you just generated and press
Ctrl + Cto copy them to the clipboard. - Open the client: Launch the v2rayN client.
- Add in bulk: Click the “Server” menu at the top of the main window (or right-click in the blank area) and choose “Import bulk URLs from clipboard”.
- You’ll then see hundreds of nodes appear in your server list at once.
Step 5: Batch Speed Test and Filtering
There may be many nodes, but their quality varies. We need to pick the ones with the fastest connections and lowest latency.
- Select all nodes: In the v2rayN list, press
Ctrl + Ato select all nodes. - Start the test: Right-click and choose “Test Servers” -> “Test Real Delay (multi-threaded)” (called Test Real Delay in some versions).
- Wait for results: The client will concurrently test the connectivity of every node, which may take from tens of seconds to a minute.
Step 6: Pick the Best Nodes
- Sort: When the test finishes, click the “Test Result” or “Latency” header at the top of the list to sort nodes by latency from low to high.
- Remove invalid nodes: Those showing
-1ortimeoutcan be deleted directly. - Final pick: The ones at the top with latency shown as green numbers (usually between 100 ms and 300 ms) are the Cloudflare optimized nodes that suit your current network.
- Right-click that node, set it as the active server, and you’re ready to go.
Comments